


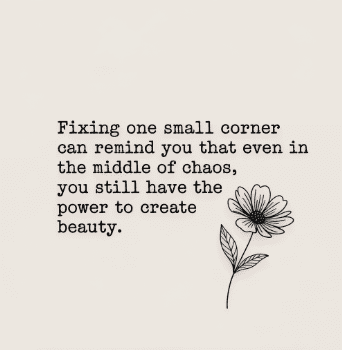
You know that feeling when life throws you into chaos and your home feels like it’s echoing the mess inside your heart? I’ve been there. Anyone who knows me knows how much I love to get my interior design on. My space is my sanctuary, and being surrounded by beauty truly helps me feel better, lighter, and more at ease. Spaces hold our stories, both the joyful and the broken ones. And sometimes, when we can’t fix everything inside, we start by fixing what’s around us. Not with grand renovations or expensive designer pieces, but with simple, soulful touches that remind us of who we are becoming. That’s the beauty of DIY. It’s not just about creating pretty things. It’s about reclaiming spaces… and parts of yourself.
Today, we’re going to talk about easy DIY upgrades that will not only elevate your space but will breathe life back into it, and into you. These are projects you can tackle in a weekend, with minimal tools, on a budget. Each one is a small, intentional act of growth. Because every brushstroke, every screw tightened, is you saying: “I’m still here. I’m still building. I’m still creating.”
1. Peel-and-Stick Backsplash: Instant Kitchen Glow-Up
Why it matters: The kitchen is where life simmers. A dull, outdated backsplash can make even the warmest kitchen feel tired. But you don’t need to tile like a pro to bring it back to life.
Materials Needed:
- Peel-and-stick backsplash tiles (choose from faux subway tiles, marble, or rustic brick)
- Scissors or utility knife
- Level
- Measuring tape
Step-by-Step Instructions:
- Measure the area you plan to cover. Order an extra sheet or two, but know that sometimes mistakes happen.
- Clean the surface thoroughly to ensure good adhesion.
- Start from the bottom corner, using a level to keep lines straight.
- Peel and stick, smoothing out air bubbles as you go.
- Trim excess with a utility knife for clean edges.
Pro Tip: Mix and match patterns for a unique, eclectic look that reflects your personality.
2. DIY Floating Shelves: Practical Beauty
Why it matters: Shelves aren’t just for storage. They’re stages for your stories, photos, travel finds, that mug you cried over but still love. Floating shelves add structure without clutter.
Materials Needed:
- Wood planks (choose reclaimed wood for character)
- L-brackets or hidden floating shelf brackets
- Screws and wall anchors
- Drill, level, measuring tape
Estimated Cost: $30 – $60 per shelf (depends on wood choice)
Step-by-Step Instructions:
- Measure the wall and mark bracket placements.
- Install the brackets securely into studs or use anchors.
- Position the wood planks and secure them.
- Style with items that feel meaningful—don’t overcrowd.
Sustainable Tip: Use salvaged wood from old furniture for a raw, authentic vibe.
3. Accent Wall with Paint or Wallpaper: A Bold Statement
Why it matters: When life feels overwhelming, controlling one wall can feel like taking back a piece of your story. An accent wall creates a focal point, a grounding anchor in the room.
Materials Needed:
- Paint or peel-and-stick wallpaper
- Painter’s tape (if painting)
- Roller or brush (if painting)
- Level (for wallpaper alignment)
Estimated Cost: $40 – $150 (depends on size and material)
Step-by-Step Instructions:
- Choose a wall that feels like it wants to speak.
- For paint, use painter’s tape to outline and protect edges.
- For wallpaper, start from the top corner and peel slowly.
- Work in sections, smoothing out air bubbles.
- Add complementary decor to tie it into the room’s palette.
Mindset Shift: Pick a color or pattern that reflects your current mood or the vibe you want to invite in, not what’s trending.
4. Updated Cabinet Hardware: Small Change, Big Impact
Why it matters: Tiny details can whisper powerful messages. Swapping out old, generic knobs and pulls for ones that feel “you” is like accessorizing your space with intention.
Materials Needed:
- New knobs or pulls
- Screwdriver
- Measuring tape (for alignment)
- Optional: touch-up paint for existing holes
Estimated Cost: $30 – $80 (depends on quantity and style)
Step-by-Step Instructions:
- Remove old hardware with a screwdriver.
- Clean the surface; fill holes if necessary.
- Measure hole distances for the new hardware.
- Install new knobs/pulls.
- Step back and admire how this tiny change feels like a quiet revolution.
Personalization Tip: Choose hardware that tells a story, glass knobs from a flea market, matte black for a modern look, or vintage brass for a soulful touch.
5. DIY Mood Lighting: Cozy Corners for Reflection
Why it matters: Lighting sets the emotional tone of a space. Soft, warm lights invite calm and introspection—a balm for busy, grief-touched souls.
Materials Needed:
- LED strip lights or plug-in sconces
- Command hooks or adhesive clips
- Smart bulbs (optional, for color control)
Estimated Cost: $20 – $60
Step-by-Step Instructions:
- Plan where you want ambient lighting, under shelves, behind headboards, or in cozy reading nooks.
- Use adhesive clips to route the LED strip.
- Plug in and adjust brightness and color to your mood.
- For sconces, use wall-safe hooks for hanging without drilling.
Resilience Tip: Use lighting as a visual cue for self-care. Set it to soft amber when it’s time to slow down and breathe.
6. Repurposed Decor: Beauty in Broken Things
Why it matters: There’s something sacred about giving an old, “broken” item a new life. It mirrors our own journey of healing and finding beauty in scars.
Materials Needed:
- Old picture frames, mirrors, trays
- Paint, sandpaper
- Hooks, rope, or twine (for hanging)
- Craft glue or epoxy (for minor repairs)
Estimated Cost: $0 – $40 (most items you already own)
Step-by-Step Instructions:
- Gather items you’ve stored away, things you’ve been “meaning to fix.”
- Sand, paint, or distress to match your vibe.
- Repurpose: old frames become chalkboards, trays become wall art, and mirrors get a fresh border.
- Display proudly. These aren’t “second chances”, they’re upgrades, just like you.
Healing Insight: Every crack filled, every scratch embraced, becomes a metaphor for your own story.
Start Small, Build Big
Your home doesn’t need to be perfect to feel like a sanctuary. Just like life, it’s the small, intentional touches that make the difference. Easy DIY upgrades aren’t just about beautifying a space; they’re about taking agency, reclaiming joy, and building resilience one project at a time.
So, roll up those sleeves. Start with one corner. Let the act of creating become a conversation with yourself, a reminder that even in brokenness, beauty is waiting to emerge.
Send me pics of your DIY projects! I absolutely would love to see your creations!
Happy DIY’ing!!
Dena